March 14, 2013

"A4 Conversion Parts, Final Test (Part 2)"


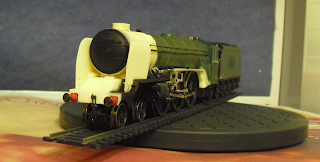
The first part of the build for this final guinea pig in the A4 Conversion Etches development, was to T-Cut the whole bodyshell and the tender to get a bit of sheen on the plastic. After some hours bringing a more metallic look to the front end in particular, it was time for the scalpel to come out, along with the tried and tested valance cutting tool.


Obviously in this picture it looks rather rough and ready, but that's what the big file in the first photograph is for! The overall finish of these cuts are much superior to 60011 Empire of India in almost every way. The second time around, gentle scoring of the plastic followed by careful dragging of the scalpel through said lines, allowed the valances (once the cutting tools were removed - they are glued in place to the valances to help with the scoring) to be bent away with a set of pliers very easily, a section at a time.


This gives you this result, with the etched firebox sides and other paraphernalia attached, including the etched access hatches at the front end of the smokebox casing, near the parabolic curve. I opted to paint these prior to gluing them onto the model, using Railmatch Garter Blue after an undercoat of Gamesworkshops Skull White.


On the left hand side, the reverser was also added.


Fox Transfers etched lettering and numerals were bought for the tender and cabside. The lettering was carefully put into place by marking out their places on the tender using masking tape, with a little super glue applied to the underside of the letters before carefully and firmly pushing them into position.


The result is surprisingly neat!


The next step was to add something I didn't do on Empire of India, and which I regret not doing: adding the superb etched lamp irons. Peter Harvey has done a magnificent job designing these to be fully accurate to the A4 Pacific type of lamp irons.


They come in two halves, and can be soldered or glued together to fit. The three lower lamp irons are the same design, the upper lamp iron is a different type and simply needs shaping, and then gluing to fit. They are surprisingly sturdy, and I'd wager that a carefully drilled set of lamps would fit rather nicely onto these.


 As you can see from this shot, nameplates (from the Fox Transfers range) have been applied, along with the cabside numerals, and the centre positioned lamp irons have now been painted a gloss black, to match the smokebox front.


Overall, this build has been very enjoyable, if not entirely perfect (and mainly down to my hand fistedness with the T-cut and cotton buds!) but this is why you do test builds, to iron out all of the bugs.

The last things to add are transfers to the front end of the casing (no.32), the etched worksplates for the cabsides, and some weathering, which I must admit I am reluctant to do as the model does look very nice in a pristine condition. However, I cannot find a single photograph (and there are a good dozen of no.32 in 1947/48/49) of Gannet looking anywhere near clean, so into a nicely weathered (but "looked after) form she will go!

Until next time, where I will finish off no.32 and start talking about the potential release of these etches for general sale.

March 13, 2013

"Vote for Allen as the world's most famous steam locomotive"


Dear everyone,


I'm NOT the most famous steam locomotive in the world, but I'd like to be! 

I need three nominations, and lots and lots of votes! 


Many thanks for your continued support of our stories,

Yours faithfully,

"Allen"


(Dictated, not read)

March 12, 2013

"A4 Conversion Parts, Final Test (Part 1)"


It's been nearly a year since I started developing this conversion kit to make a late 1940s London & North Eastern Railway garter blue A4 Pacific, from a Hornby 1930s A4 Pacific. In that time I've dealt with the first set of trial etches (which you can read by clicking here: Part 1, Part 2), identified some shortcomings and had the artwork modified to take into account these shortcomings. The result was no.60011 Empire of India.

Peter Harvey has been terrific throughout the prolonged development process, and I can show here the final set of test etches, prior to testing them on the next "guinea pig".


However, you will note a new brass etch amongst the original two sets. This third etch is for adding Cab window spectacles, a suggestion made on the LNER forum and now acted on.


The initial thought is that the etches are the right size and shape (a very good start!) and that the removal of the silver painted faux spectacles will allow the brass ones to look the part better. I will start by stripping the printed numbers on the cabsides and smokebox front of this model, before continuing on to repeating the process I worked through last June in terms of removal of the valances, and addition of the etched components.


One change I will be making to this build, is to fit the lamp irons as the designer intended (the etch is designed to be used to create the correct shape and design lamp irons, which Hornby's model does not portray).

The intended identity of the guinea pig has been chosen, and it will be no.32 Gannet. You will note that the tender behind is not the correct type. The reason for this is that I am waiting on a spare garter blue non corridor tender which I have lent to a friend for use on his exhibition layout of sorts.

When that reappears, it will be coupled behind Gannet, which will be the first and only one of my A4s in full LNER livery, albeit with stainless steel lettering and numbering, and no.32 on the smokebox front.

The original locomotive survived well into my chosen time period in LNER livery and never actually carried British Railways branding whilst in garter blue. This therefore made her the obvious choice, amongst numbers 14, 25 and 26 (Silver Link, Falcon and Miles Beevor respectively).

This makes her the second bird namer in the fleet after Mallard, the ratio of the "special" A4s to the normal A4s being quite out of balance for a normal working timetable to be frank.

Once I'm satisfied there are no further changes to be made to the artwork, I intend to make the etches available for sale, both as a set of the three etches together, and the two smallest etches separately.

If anyone has any feedback on this product they'd like to share, please do so via the comments section here and on any blog entry featuring the A4 conversion etches.

Until next time, when I should have finished working on this one!

March 11, 2013

"A4 Conversion Etches - further update"


I've had a surprising amount of interest in these etches to convert a garter blue Hornby A4 into either its post-war variant or into Sir Nigel Gresley of the 1980s, so an update is necessary.

I'm taking delivery of a further set of test etches from Peter Harvey, which I will use over the coming weeks on a further A4 model, and will showcase the build on this blog. This takes into account previous discussion, including the addition of some etches to represent the cab front window spectacles, and some slight modifications to the artwork for parts to fit more cleanly.

Once I've finished with these test etches (and only if no further problems are found), I will be making them available for purchase later in the year.

Just want to add my thanks to Peter Harvey for his work in developing this product, and to everyone interested for their patience in the development of these etches. 

Until next time!

March 06, 2013

"New project musings...Thompson B3/3?"


I still have a few Bachmann B1s knocking about, despite now being superseded by Hornby's excellent model. I'd recently bought this spare Great Central tender (spare from a Bachmann Great Western 2251 locomotive, as the GWR pattern buffers attest), and the idea forming is building a model of Thompson's lone (and apparently poor) B3/3 locomotive.

It would need 6ft 9in wheels or similar (Hornby 6ft 8in wheels perhaps) on a wheelbase with pretty even driving wheel spacing. It is in fact, bar the front arrangement, the same wheelbase as the "proper" B3, of Robinson design and Great Central Railway origin.

If I ever get further than this mockup, it would produce another unique locomotive, that is for certain!

Until next time.

March 04, 2013

"We're in the printing stage!"


The excitement for the forthcoming children's paperback book, Tale of the Unnamed Engine, is building as we are now in the printing stage of production!

The artwork for the Amazon Kindle and Kobo eBooks has been updated to match the paperback's new artwork.

I will keep everyone posted throughout March as we develop the book further and get towards the delivery stage.

I can also confirm with delight, that the RRP for the paperback book will be £7.99, an excellent price for the quality and length of the book.

Until next time!

March 03, 2013

"Great Northern on the final straight..."


I've been working on a model of Thompson's lone A1/1 Pacific, Great Northern, for what seems like forever at times.

However with the failure of my original build, out of the ashes comes a much more pleasant and more accurate affair, with the help of Graeme King's excellent resin parts, a much valued friend and modeller to work on the valve gear for me, and a little bit of bravery to have a go and chop up a Hornby A3 to build a Thompson 6ft 8in Pacific!


At the front end, I have test fitted the buffers, which are a loose fit with white tack, along with the front coupling. The lifting holes in the frames have also been drilled out, and the smoke deflectors have gained their grab handles on the lower edges.

The smokebox has had the holes for the original handrails filled in (these areas will require further touching up, as my dry brushing with black acrylic paint has proven in this photograph).


The tender has had its side sheets straightened, but I am yet to add handrails. The cab is the next section to tackle on this particular model of 60113, as these need straightening to match the tender.


I have also fitted the steam pipe, and handrails on both sides, along with all of the running plate paraphernalia, including the lubricators.


You may notice that the bogie has changed from the last update. This is down to an amazing oversight on both mine, and Hornby's part. Earlier models of the Gresley A3s and A4s had the pivot on the bogie set at a particular height. The latest models have a longer pivot, which was causing the front end to lift up unnecessarily! I have replaced the later type with the older type, until I figure out how to shorten the pivot.


The final change has been to fit the side frames. These are now firmly fitted in place, with some heavy duty plasticard sandwiched between them and the chassis block, glued with cyano.


The bogie (originally a Gresley type) has been replaced with a Hornby B1 bogie of the correct type, giving the correct look at the front end, and side frames. The clearance of the bogie is excellent, and I have been very encouraged by the model's test runs on 3rd and 4th radius curves.

I still need to fit the cover for the reverser on the left hand side, in addition to the aforementioned cab side sheets, and fitting of handrails there and on the tender.

Then, it'll be into primer, and then into blue before lining out...I can hardly wait. Six years after I started the original, I'm finally going to have my express passenger blue Thompson A1/1 I've always wanted.

Now where ARE those straight sided nameplates I ordered...!

Until next time.